
A well-executed tile transition does significantly more than simply finish a floor. It serves as the critical engineering component that prevents structural damage, mitigates tripping hazards, and integrates distinct architectural zones into a cohesive visual narrative. When you walk through a home, the subtlety of the floor transition often dictates the feeling of quality. In this comprehensive guide, you will learn exactly how to select the correct transition approach, compare complex trim options, and plan layouts that appear intentionally designed rather than treated as an afterthought.
If you are currently working on a kitchen renovation, a bathroom update, an entryway overhaul, or defining zones in open-concept spaces, these strategies will assist you. We will explore how to create a smooth transition between two distinct materials while simultaneously injecting elegance, contrast, and ensuring long-term durability.
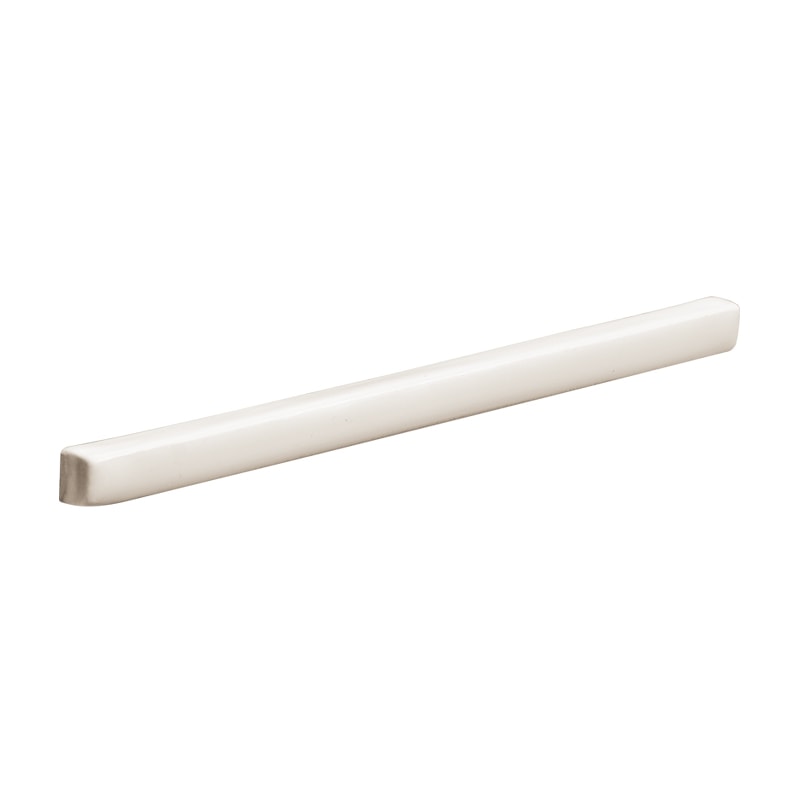
Standard profiles may not always suffice for renovations involving uneven subfloors or intricate geometric patterns. To bridge the gap between distinct zones with precision engineering, visit our Custom section for bespoke fabrication options that ensure your transitions are as durable as they are beautiful.

Tile Transition Basics: What Is a Transition and Why Does It Matter on Every Floor?
A transition is the intentional meeting point where one surface concludes and another begins. This occurs most frequently where tile meets hardwood, laminate, vinyl plank, or carpet. Beyond the superficial appearance, the correct detail manages the natural expansion and contraction of materials, protects the exposed edges from impact, and maintains a finished aesthetic in high-traffic areas.
Understanding the physics of your floor is the first step. Different materials behave differently under changing humidity and temperature conditions. Wood expands and contracts with the seasons, while ceramic and stone tile remain relatively static. If you butt these two materials tightly against one another without a proper transition or expansion gap, the pressure can cause the tile to crack or the wood to buckle. Therefore, a transition is not just a decorative strip; it is a functional necessity that allows your home to breathe.
Designing tile transitions is also about controlling the narrative your spaces tell. You must ask yourself if you desire a distinct separation between two spaces, or if you prefer a continuous flow from one room into the next. When executed thoughtfully, transitions can transform the overall design logic of a home. They turn a simple seam into a focal point that adds depth, texture, and architectural interest.

Floor Transition Planning: How Do You Handle Height Differences Without Creating Tripping Hazards?
Height differences, often referred to within the industry as “lippage” or vertical displacement, occur for practical reasons. Tile thickness, the depth of the mortar bed, the presence of underlayment, and even the specific type of floor tiles you choose can drastically change finished elevations. A porcelain tile might sit 3/8 of an inch high, while an adjacent luxury vinyl plank might only be 5 millimeters thick. The goal is to create a smooth transition that feels safe underfoot and visually calm. This is especially vital in areas where people pivot or step quickly, such as kitchen entries or hallway intersections.
Start by accurately measuring both finished surfaces relative to the subfloor before you mix a single bucket of mortar. You must account for the adhesive layer as well; thin-set mortar will raise the tile slightly. Planning the transition line should happen before setting tile. If the difference in height is noticeable, you must use a tapered solution to avoid a trip hazard. This is often achieved through a reducer profile or a sloped threshold.
Ignoring this step is the primary cause of post-installation regret. A sudden vertical lip of even a quarter inch is enough to cause a stumble. This is where thinking about functionality matters most. Entryways and main corridors punish sloppy planning quickly. If the height difference is extreme, you may need to use a patching compound or self-leveling underlayment to ramp the subfloor up gradually to meet the higher material, spreading the slope over several feet so it becomes imperceptible to the walker.

Trim Choices: Which Trim Works Best for a Tile Floor Edge?
Trim serves a dual purpose: it is a protective system for vulnerable tile edges and a clean visual stop for a tile field. Without trim, the raw edge of a tile reveals the clay body or stone interior, which is often a different color than the face and is highly susceptible to chipping. Common choices include tile edge trim in metal profiles or traditional porcelain trim pieces. Each option significantly alters the final aesthetic.
Metal Profiles: Metal reads as modern, crisp, and architectural. Materials range from satin anodized aluminum to brushed stainless steel and solid brass. An L-angle profile is often used for direct transitions where heights are equal. It creates a nearly invisible line that protects the tile edge without drawing attention to itself. For a bolder look, a wide metal band can serve as a deliberate border.
Porcelain and Stone Trim: Matching tile trim, such as bullnose or quarter-round, feels seamless and transitional. This approach is often favored in traditional or Mediterranean-inspired interiors. The benefit here is color continuity. The trim is made from the same material as the floor, ensuring a perfect match in tone and texture. However, many modern tile lines no longer include matching bullnose pieces, which forces installers to turn toward metal profiles or custom stone fabrication.
If you desire a minimal look, consider metal tile trim at the edge of the tile where it meets another floor. If your design leans classic, molding-style trim can blend better with traditional interiors, especially next to hardwood. Either way, choose trim that complements nearby colors and textures so the transition looks intentional rather than improvised.
Transition Strip Options: When Should You Use a Transition Strip Versus a Flush Detail?
A transition strip is a practical fix when two materials meet and you need a high degree of forgiveness. This applies to movement gaps, small height offsets, or a vulnerable edge that was not cut perfectly straight. It is especially useful when one side is a floating system like laminate or vinyl plank. Floating floors require significant expansion space; they cannot be pinned down by the tile. A transition strip, such as a T-molding, covers this gap while allowing the floating floor to slide freely underneath it.
The Flush Detail: If both surfaces can be installed flush and are structurally stable (such as a nail-down hardwood meeting a tile floor on a stable subfloor), you can sometimes skip a raised strip and aim for a clean, flush meeting line instead. This is often achieved using a metal Schluter-SCHIENE or a similar separating profile. This look is highly coveted in contemporary design because it eliminates visual clutter.
However, you must be honest about real life. Furniture legs, grit, heavy foot traffic, and daily wear hit the seam hard. In many home improvement projects, a well-chosen strip looks better long-term than a “perfect” detail that eventually chips or loosens due to house settling. If you opt for a flush transition, ensure the cuts on both materials are factory-perfect or smoothed with a diamond pad, as there is no trim to hide a jagged edge.

Tile to Wood: What Is the Cleanest Tile to Wood Transition With a Wood Floor?
The cleanest tile to wood approach depends entirely on whether the wood floor is floating, nailed, or glued. It also depends on whether you want high contrast or near-invisibility. A wood transition reducer can soften the step if there is a height change, while a slim metal transition can create a sharp modern boundary when levels match perfectly.
For a truly sophisticated tile to wood transition, many designers are now opting for organic or irregular transitions. Instead of a straight line cutting across the room, the tile (often hexagonal or distinctively shaped) “bleeds” into the wood floor. This requires precision cutting of the wood planks to trace the shape of the tile. While labor-intensive, the result is a stunning, custom floor that acts as a piece of art.
Regardless of the shape, keep the grout line straight and consistent where it abuts the trim. Do not crowd the wood. You must leave the required movement gap and cover it with an appropriate profile or a flexible sealant matching the grout color. This is where complementary design pays off. You should match undertones so the wood does not look overly “yellow” next to a “cool” grey tile. Furthermore, plan the seam location so it does not land awkwardly in the middle of a doorway. Ideally, the transition should occur directly under the door itself, so the floor change is hidden when the door is closed.

Creative Tile Layouts: How Can a Tile Pattern Elevate the Seam and Add Visual Interest?
Creative tile choices can turn a functional seam into a primary design feature. This is particularly effective when you use tile to create a border, a ribbon, or a medallion-like break between two materials. Rather than trying to hide the transition, you highlight it. A geometric band at the transition line can add visual interest and make the meeting point feel like a deliberate part of the architectural plan, not a compromise.
The Threshold Feature: In wide openings between rooms, consider installing the tile perpendicular to the main field, or using a different material entirely, like a marble saddle, to frame the transition. This signals to the brain that one zone is ending and another is beginning.
If you want to make a bold statement, try inlay tile as a thin strip that echoes the backsplash or countertops in a kitchen. This approach can create a seamless moment visually. Even if the floor materials differ, you are tying the room together by repeating shapes, tones, or a tile pattern that appears elsewhere in the room. For example, a mosaic border featuring the same stone as your kitchen island countertop creates a vertical visual connection that is very pleasing to the eye.
Contrast and Complementary Picks: How Do You Choose Contrasting Colors Without Clashing?
Contrast works when it is strictly controlled. The formula generally involves one primary surface, one supporting surface, and a transition detail that connects them. If you choose contrasting colors, you must anchor them with a shared undertone. For instance, if your wood floor is a warm oak, your contrasting grey tile should have warm beige undertones rather than cold blue undertones. This ensures the floor does not look accidentally mismatched.
Try pairing glossy tile with a matte wood look for a deliberate contrast in sheen. The play of light across the floor adds dimension. Alternatively, use different tile in adjacent zones to define two spaces without building walls. This is common in bathrooms, where the shower floor mosaic might spill out into the main bathroom floor to create a “wet mat” effect.
The best results feel complementary. The tile and the neighboring floor should complement each other’s grain, veining, or texture rather than competing for attention. If your wood floor has a heavy, rustic grain, a quiet, solid-colored slate or concrete-look tile is often a better partner than a busy, patterned encaustic tile. Too much pattern on both sides of the transition creates visual chaos.
Tile Edges Protection: How Do You Protect the Tile From Chipping at the Edge?
The fastest way to ruin a clean tile installation is leaving the tile edge exposed in a high-wear seam. Ceramic and porcelain are incredibly hard, but they are brittle. A sharp impact on an exposed corner will cause it to spall or chip. To protect the tile from chipping, you must use a profile or trim that covers the vulnerable corner.
Spacing and Grouting: Do not skip correct spacing. Your spacer choice and grout consistency matter more than people expect. When tile meets a metal profile, there should be a small gap for grout to lock the tile against the metal. However, when tile meets another material like wood, you should generally not use grout. Grout is rigid and will crack if the adjacent material moves.
Instead, apply caulk or a siliconized sanded sealant where manufacturer guidance calls for flexible joints. This is crucial where the tile meets a different material. The caulk allows the edge to move slightly without cracking the joint. Most grout manufacturers sell color-matched caulk specifically for this purpose. This small detail is the difference between a professional installation and one that requires repair after six months.
Room-by-Room: What Changes for a Kitchen, Bathroom, and Entryways?
Context is everything. The transition solution you choose for a master bedroom is likely inappropriate for a mudroom.
The Kitchen: In a kitchen, durability and cleanability dominate. You must choose a transition that is easy to scrub and does not trap crumbs at the seam. High-profile thresholds can become tripping hazards for people carrying hot pots or heavy dishes. If the tile meets another floor near counters or an island, align the transition so it feels related to the layout. Running the transition parallel to cabinetry lines often looks calmer and more ordered than a random diagonal line.
The Bathroom: In a bathroom, water management matters more than visual drama. The transition at the door acts as a dam in the event of a minor overflow. Keep the transition tight and sealed appropriately. Use a solid surface threshold (like marble or engineered stone) that is slightly raised if you are concerned about water migration. Ensure it is placed where it will not trap moisture against wood flooring in the hallway.
The Entryway: For entryways, grit and small rocks act like sandpaper on every edge. This is the harshest environment for a floor. Pick a tougher trim profile, such as stainless steel or thick brass, which can withstand impact. Avoid soft aluminum profiles in these zones as they will scratch and dent. Avoid details that sit proud and catch debris. A well-planned entryway transition also creates a clear “welcome line” that signals you have entered a new zone of the home.

Installation Reality Check: What Should You Know Before Installing a Tile Transition?
Before installing a tile detail, you must confirm your subfloor is flat. A hump or dip in the subfloor right at the transition point will make a clean installation impossible. Your layout lines must make sense. Do not just start tiling from the wall; calculate where the tile will land at the transition. You want to avoid creating awkward slivers of tile that are less than two inches wide. These small pieces are difficult to cut and prone to breaking.
The Dry-Lay: This is where larger tiles change the math. A small shift at the seam can force tiny cuts that look messy. Always dry-lay your tiles and your transition strip before mixing mortar. Adjust your starting point to ensure a substantial tile piece lands at the doorway.
Use the right adhesive for the tile type. Large format tiles require medium-bed mortar to support their weight and prevent lippage. Keep an eye on cure times so the seam stays aligned; you do not want foot traffic shifting the transition piece before the mortar sets. If you are mixing two materials, test the finish heights with samples first. Stack your tile, mortar, and backer board to see exactly how high it stands compared to your wood or carpet. This allows you to create a smooth transition without improvising at the last minute.
If you are feeling overwhelmed, remember that professionals deal with these micro-measurements daily. If you would like a tailored plan, contacting a professional for a design consultation is often worth the investment to avoid costly rework.
Key Things to Remember
- Function First: A good transition protects the edge, manages movement, and improves aesthetic appeal on any floor.
- Safety: Plan for height differences early so you avoid tripping hazards and awkward reducer choices.
- Trim Strategy: Use trim strategically. It can add elegance, hide gaps, and improve durability in traffic areas.
- Forgiveness: Choose a transition strip when you need forgiveness; go flush only when both surfaces support it.
- Color Harmony: For tile transition details next to hardwood or a wood floor, match undertones to keep a cohesive look.
- Artistic Flair: Creative tile bands and inlay tile can turn the seam into a focal point with depth and interest.
- Edge Defense: Protect exposed tile edges with the right profile, spacing, and flexible joints where required.
- Zone Specifics: Room conditions matter. Kitchens need easy cleanup, bathrooms need moisture-smart detailing, and entryways need toughness.